Crownfall Strategy: How to Win More Matches | Playgridia
You already know how the game works: muster a host, clash for a border, march once, pass. This is the other article — the one about Crownfall strategy. Every section below is a decision, a number, or a mistake that costs new marshals matches they were leading. One paragraph of recap, then no more rules.
The recap, and then no more rules
A turn is three beats. MUSTER: your new troops arrive and you place them. CLASH: as many assaults as you like. MARCH: one move between two territories you own, after which the turn ends by itself. A territory does not hold a number — it holds a host of three arms: Spearline, Outriders and Hammers. In a clash both sides roll one six-sided die at the moment of the assault and add it to the Might they built; the totals are compared once, and the margin decides how many fall. You win by holding the crowns at the start of your turn, by claiming three posted decrees, or by being the last marshal standing. If any of that is new, start with our how to play Crownfall guide. Now the tactics.
Your host is a position, not a total
The most common beginner mistake is reading the badge. A twelve is not a twelve. Spearline attacks at 1 and defends at 2; Outriders and Hammers attack at 2 and defend at 1 — so six Outriders and twelve Spearline hit exactly as hard. On top of that sits the ring: Spearline stops Outriders, Outriders ride down Hammers, Hammers smash Spearline, and winning that matchup is worth +2 Might. Your leading arm is whichever arm is most numerous in the force you actually commit, not in the territory it came from.
Work one example and the whole game opens up. Four Spearline on ordinary ground: they defend at 8, their dug-in weight is 8 so they are entrenched for another 1, and their leading arm is Spearline.
| Same 12 attack power | Six Outriders | Six Hammers |
|---|---|---|
| Your Might | 12 | 12 + 2 (ring) = 14 |
| Defender’s Might | 8 + 1 (dug in) + 2 (ring) = 11 | 8 (Hammers cancel Ground) |
| Lead before the dice | +1 | +6 |
| Chance to win the clash | 21 of 36 rolls, 58% | Always |
| Chance to take the ground in one exchange | Impossible | 6 of 36 rolls, 17% |
Same attack power, same tile, two completely different assaults. The Outrider charge risks being thrown back (28%) and can never take that tile in one exchange: the largest margin it can reach is 6, which kills three of the four defenders. The Hammer charge cannot lose at all. That is the whole lesson — build the arm the target is weak to, not the biggest pile you can afford.
The certainty rule is what you read instead of odds
The widest swing two dice can produce is five. That single number is where all of the tactics sit, because you can see the lead before the dice and the assault bar prints it for you.
| Lead before the dice | What the dice can still do |
|---|---|
| +6 or more | Nothing. You win the clash; only the size of the margin is in doubt |
| +5 | You cannot be thrown back; the worst case is a churn, where both sides lose one |
| +1 to +4 | Favoured, but a thrown-back charge is still live |
| 0 | Even. 6 rolls in 36 churn |
| −5 | You cannot win; the best case is a churn |
| −6 or worse | Nothing. You lose — do not press |
But note the gap: winning the clash and taking the ground are not the same thing. The territory only falls if the casualties reach the whole garrison. The Hammer charge above never loses and still clears a four-unit garrison only 17% of the time in one exchange. The right button there is To the End: the first wave is the charge you set, every wave after it is everything that can still ride out, and against a garrison already ground down to two the same charge takes the tile on every roll. It stops on three things — the ground falls, the origin drops to the single unit that holds the door, or six waves are spent.
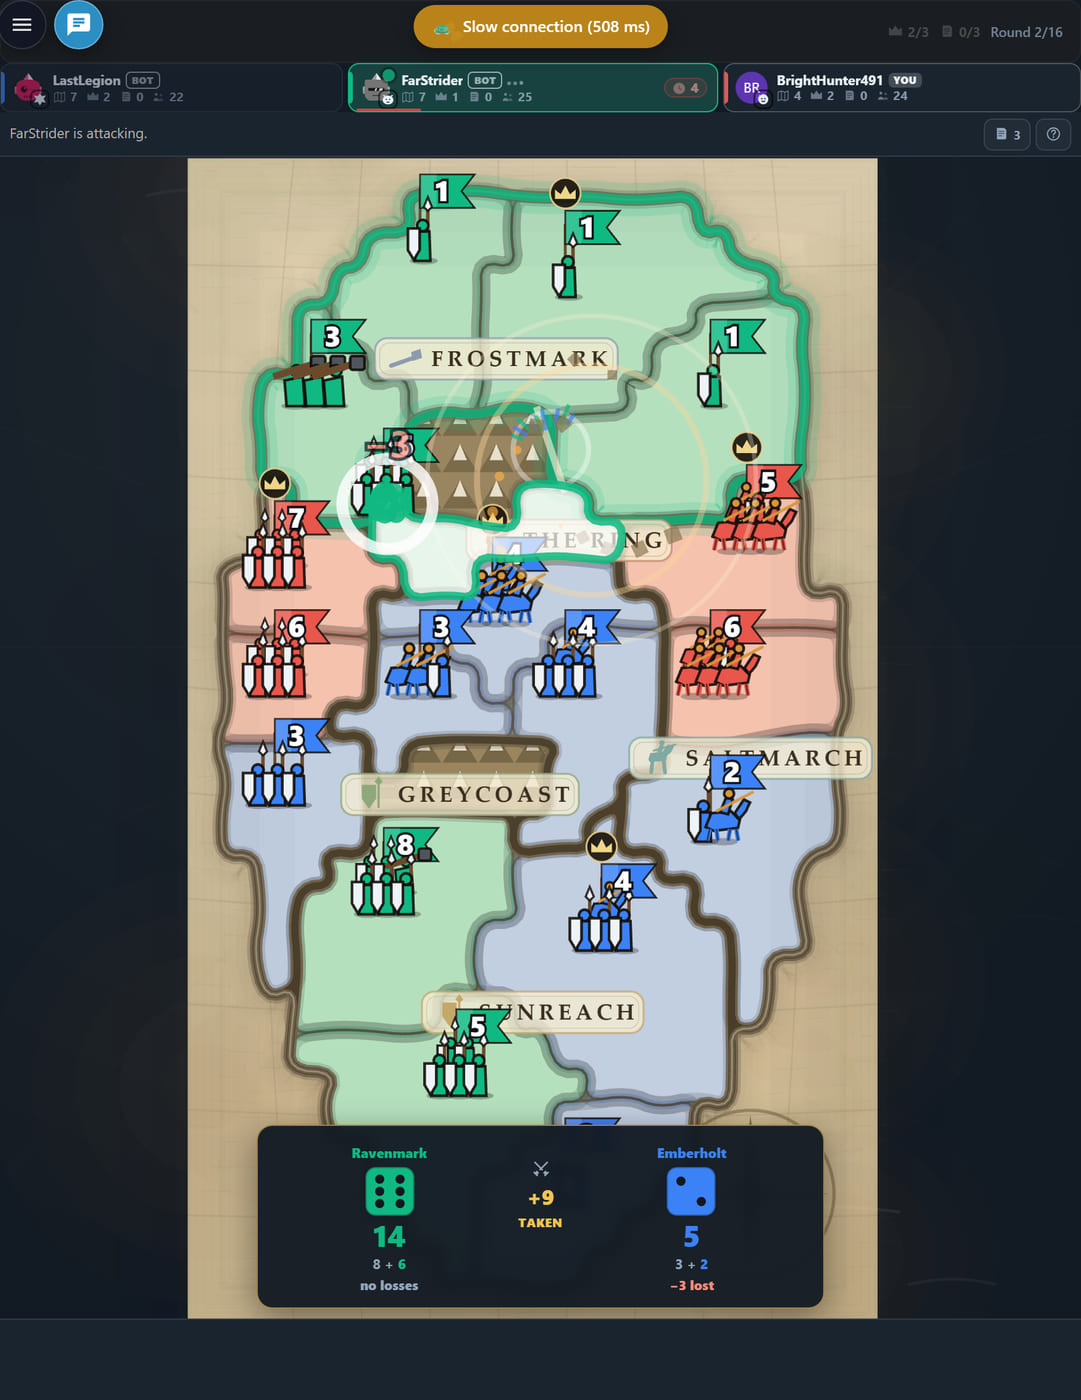
The percentage on the bar is not an estimate: it is an exact enumeration of all 36 outcomes, 216 with a War Banner. So One Clash is worth exactly what the bar says — read it and press.
The margin is the prize, not the capture
The loser of a clash loses 1 + margin ÷ 3, rounded down and capped at six. This is the rule most new marshals never internalise: a bigger win kills more. Winning by one takes a single unit off them; winning by nine takes four.
- A close win is bloody. Win by two or less and you lose a unit as well.
- A tie churns. Both sides lose one, and the assault may continue.
- Being thrown back does not close the border. The charge returns to its origin — but you may attack the same border again in the same turn, as long as the origin can still send somebody out. The engine keeps no per-border attack lock.
- There is no such thing as an empty enemy territory. A clash the attacker did not win can never take the defender’s last unit, and no charge may empty its own ground.
One more detail worth exploiting: casualties come off the arm that lost the matchup first, and only then off whichever arm has the most bodies. Bring Hammers against a Spearline wall and it is the spears that die — exactly the arm that was holding the entrenchment together, so two clashes in the same direction can strip a garrison of its defensive backbone even if neither takes the ground.
Muster is a map decision, not a number
Your Levy is 2 + territories ÷ 4, minimum three, and it is always Spearline. Twenty territories pays seven: the Levy will never win a match on its own, it exists so a beaten-down marshal still gets a real turn.
Everything that scales comes off the map. Hold a region’s Seat and it pays +1 of that region’s own arm every turn; hold the region in full and it pays +3 and unlocks its Edict. There is nothing in between, and a region you complete does not pay until your next Muster. Two strong lines follow:
- Take Seats early. A Seat is the cheapest permanent income on the board and it is also a Keep — worth +3 to whoever defends it. It is the one tile on your map worth over-garrisoning.
- Finish a small region before you widen a big one. Three territories that complete a region beat five scattered across three: partial credit is one unit, completion is three plus an Edict.
The Edicts are free and they are why completing a region matters beyond the arithmetic. Second Levy adds two Spearline on the spot; Ride Ahead lets any march cross two territories; Longboats waives the sea-lane cost for one assault, and it is a counter, so two such regions give you two. Undermine strips a keep’s +3 for the whole turn even with no Hammers in the charge — the only way a pure cavalry army ever cracks one, though a dug-in line still adds its point. And Call the Banners makes your next assault roll two dice and keep the higher: +0.97 Might on average, near enough a full point. It is public, and exactly one region per board carries it — The Ring on Heartland, Gallia, The Lakes, Sunthrone and Levantis elsewhere.
The decree track is the fastest win, and it starts three turns ago
Three decrees stand posted at all times. They are public, they are shared, and the first marshal to satisfy one claims it. Claim three and the match is over.
The clause that decides how you play it: you can claim at most one per turn. Three marks therefore costs three turns minimum, no matter how far ahead you are. A marshal who starts thinking about decrees on round eight has already lost that race to somebody who claimed a cheap one on round two.
A claim pays three things at once: the mark, three units of the arm that decree suits — delivered to your most pressed border — and +1 to your Levy for the rest of the match. That last one compounds: three claims is three extra troops every turn thereafter.
Read what the track is asking. Some decrees want ground (both ends of a crossing, a named Seat, a named region in full, ground in several regions), some want an army (five of one arm, or seven Outriders, in a single host; or one host of nine), and some want tempo (two or three clashes won in a single turn). The tempo and army decrees are gold for a player who is behind, because they need no new territory: a losing marshal with one fat border stack can claim "win two clashes this turn" out of nowhere. It is a race, not a checklist — taking one of the two tiles a hold decree names denies the claim outright, and a decree disqualified by the current position goes to the bottom of the deck rather than the bin, so it can come back later.
Three finish lines — pick the one that is open
The crowns are checked at the start of your turn, which means you must survive a full round wearing them. New marshals take their third crown, empty the garrison to do it, and lose it before the check ever runs. Take the crown with enough left standing to hold it, or do not take it this turn. At three or four seats you need three of the five; in a duel you need all five, because the opening deal is already 3–2. Crown wins are not even checked until two full rounds are done, three on Asia.
If the round cap arrives first the match is scored: 1 per territory, 3 per crown, 4 per decree, 2 per region Seat — and armies score nothing at all. A doom-stack of twenty parked in a corner is worth precisely zero, so when the cap is close, spend it: two more territories beat any pile. If the room was opened on Quick pace that arrives sooner still — the cap is 40% shorter, which makes the score sheet the most likely ending.
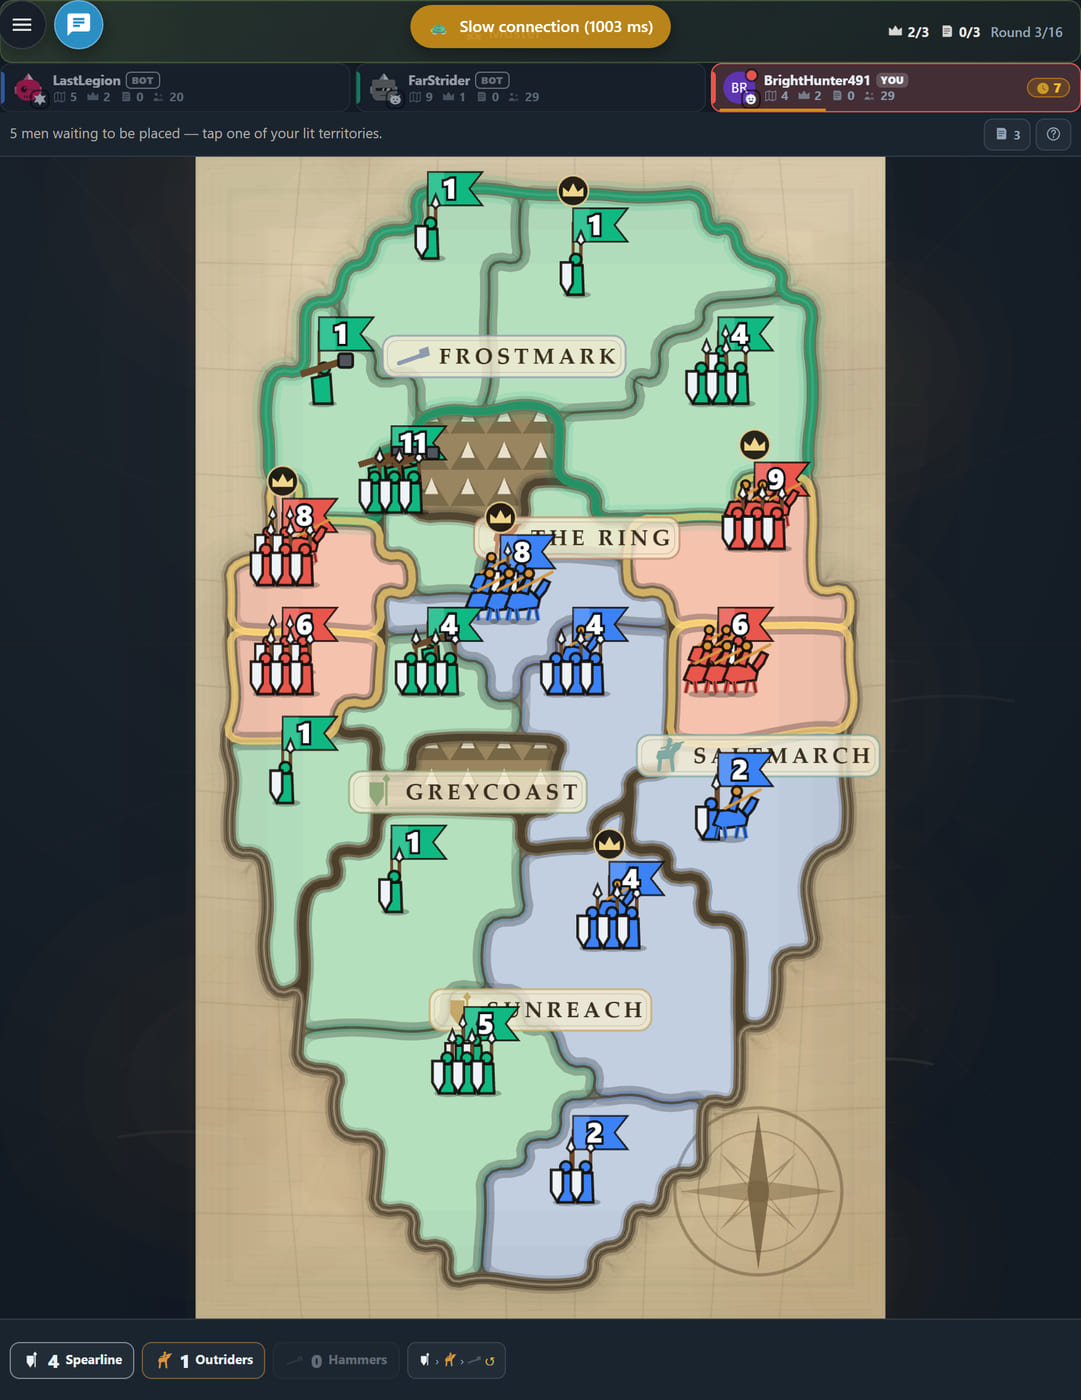
The board changes which race is realistic. Heartland is eighteen territories over sixteen rounds and every crown on it is also a region Seat, and therefore a Keep — bring Hammers or bring nothing. Asia is the long war: thirty-four territories over twenty-four rounds. Anatolia and the Mediterranean is thirty territories where every sea crossing costs 2 Might, which quietly pushes its endings onto the decree track.
Five habits that beat any single tactic
- Read the defender’s leading arm before you pick your charge. The +2 is free and it is worth half of everything a die can swing.
- Leave Spearline at home. It defends at 2 and counts double toward digging in, so two spears left behind are a real garrison rather than a formality.
- Read both Mights before you commit. A lead of six is already a win, and attacking at +1 is the worst assault in the game: seven times in ten it costs you a unit as well, and it hands the initiative straight back. The exception is a tempo decree, where a narrow win still counts.
- Spend your march. It is free repositioning, it never costs a unit, and a column of pure Outriders crosses two territories rather than one — but remember it is the last decision of the turn, and making it ends your turn.
- Watch the clock. The default 120 seconds is one budget for the muster, every assault and the march together. Run it out and your turn is passed: the levy is placed, the phases end out, and you have given away the initiative.
Take one of the five boards and try the Hammer line from the first section — the difference between a coin flip and a certainty is one arm. Play Crownfall free on Playgridia, in the browser, with no download and no account, against friends or bots at any difficulty.
Any third-party brand or game names mentioned are trademarks of their respective owners. Playgridia is an independent platform and is not affiliated with or endorsed by them.
Frequently Asked Questions
What is the fastest way to win a match of Crownfall?
Usually the decree track. You can claim at most one decree per turn, so three marks costs three turns minimum — which means starting early beats starting strong. Each claim also pays three troops immediately and adds +1 to your Levy for the rest of the match, so the marshal who claims first tends to out-produce everyone afterwards.
How do I beat a defender sitting on a keep?
Bring Hammers. A keep is +3 to the defender and a garrison of four weighted units is dug in for another point, but any Hammer in your charge cancels the ground bonus outright. That is the entire job of the arm. A pure cavalry column stalls in front of a keep forever, no matter how large it gets — the only alternative is the Undermine Edict.
How big a lead guarantees a win in Crownfall?
Six. The widest swing two dice can produce is five, so if your Might leads by 6 or more before the roll, that clash cannot be lost. Winning and capturing are different things, though: the ground only falls if the casualties reach the whole garrison, otherwise you have simply ground it down.
Should I press One Clash or To the End?
One Clash resolves a single exchange and the percentage on the bar is exactly its odds, so that is the metered option. To the End sends wave after wave at the same border and stops when the ground falls, when the origin drops to the single unit that holds the door, or after six waves. It is the right button against a garrison you cannot lose to but cannot clear in one go.
If my charge is thrown back, can I attack that border again this turn?
Yes. The charge returns to its origin and the engine keeps no per-border attack lock, so you may assault the same border again as long as the origin still has at least two units. Somebody always holds the door: no charge may empty its own ground, so one unit must stay behind for you to attack at all.
How many players is Crownfall best with, and which board should I start on?
Two to four marshals, with bots filling any empty seat. Start on Heartland: eighteen territories, sixteen rounds, and a portrait board that fits a phone screen whole. Note that every crown on Heartland is also a region seat and therefore a keep, so plan on Hammers before you go crown hunting.